How to Install a Fence or Trellis on Soft Ground? Easier Than You Think!

What You’ll Need to Install N Fence Panels:
-
-
N + 1 wooden posts (preferably square: 9×9 cm for fences, 7×7 cm for trellises)
-
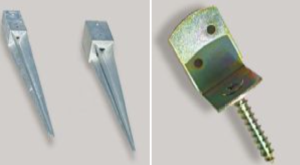
N + 1 metal ground spikes (one per post)
-
N × 4 metal mounting brackets (with screws)
-
(N + 1) × 2 screws Ø 8 × 50 mm
-
(N × 4) × 2 screws Ø 3 × 35 mm
-
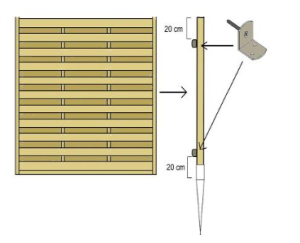
Use posts at least 20 cm taller than the panel height. This helps keep the wood above ground level, preventing rot from moisture.
Tools Required:
-
- Spirit level
-
-
Tape measure
-
Screwdriver or drill
-
Hammer
-
A wooden block (for hammering in spikes)
-
Strong string or line (for alignment)
-
Step-by-Step Installation
Fence panels, trellises and pergolas are installed using wooden posts anchored either in drive-in ground spikes or metal ground anchors.
Ground spikes are ideal for soft surfaces like soil or lawn, as they keep the wood posts elevated and away from direct contact with the ground.
For hard surfaces, we recommend using bolt-down metal post bases.
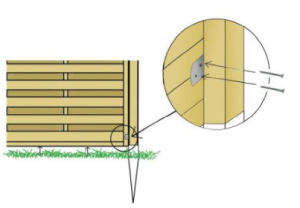
The fence panels are attached to the posts with metal brackets and screws — 4 brackets per panel.
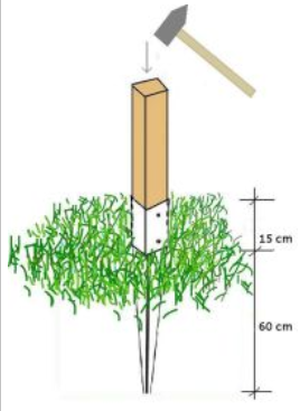
Step 1: Drive the Ground Spike into the Soil
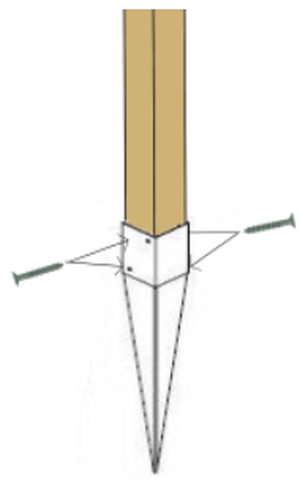
Use a hammer and a wooden block to drive the metal spike into the ground — the block prevents deformation of the metal while hammering. Make sure the screw holes on the spike are positioned away from the side that will face the panel.
After every few hits, check with a spirit level to ensure the spike is going in vertically. It should protrude about 15 cm above the ground to keep the wooden post elevated and protected from moisture.
Tip: Use a wooden block with similar dimensions to the post — it will make insertion easier and protect the spike from damage.
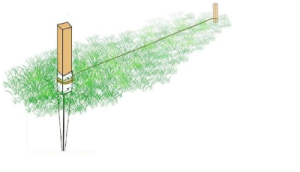
Step 2: Align the Fence Line
Stretch a strong line between two points to mark where the fence will go. This ensures a straight, clean look and consistent post spacing.
Step 3: Insert and Secure the Post
Place the post into the ground spike and fix it in place with two Ø 8 × 50 mm screws, one on each side. Use a spirit level to check alignment. If the post is slightly tilted, you can straighten it while tightening the screws.
Step 4: Attach Mounting Brackets
Screw in the four metal brackets that will support the panel. Hold the panel in place to determine where the next ground spike should be positioned.
Step 5: Mount the Fence Panel
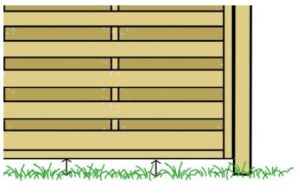
Attach the panel a few centimeters above the ground to protect it from direct contact with moist soil. Use two Ø 3 × 35 mm screws per side to secure the panel to the brackets.
Step 6: Repeat for Remaining Sections
Continue installing the rest of the fence sections using the same steps. Be sure to check alignment and vertical positioning as you go for a professional-looking finish.